How Textured Paintings Are Made | Rosemary Art

How Textured Paintings Are Made: The Artist's Guide to 3D Art
Have you ever looked at a piece of artwork and felt an overwhelming urge to reach out and touch it? That captivating, three-dimensional depth is the magic of textured art. If you are wondering how textured paintings are made, you are not alone. This unique art form combines sculptural dimension with classic painting techniques to create breathtaking visual and tactile experiences.
At RosemaryArt, our artists specialize in crafting museum-quality, hand-painted masterpieces that bring walls to life. In this comprehensive guide, we will take you behind the scenes of the studio to explore the precise tools, materials, and techniques that turn a flat canvas into a dynamic, heavy texture masterpiece.
Understanding the Materials and Tools
What Materials Do Artists Use to Create 3D Texture?
To build substantial depth that won't crack over time, artists rely on specialized mediums mixed with high-quality paints. The most common foundational material is texture paste (also known as modeling paste), a thick, acrylic-based gel that dries to a hard, sandable finish.
Artists often blend this paste with heavy-body acrylics or traditional oil paints. For oil-based masterpieces, like the ones featured in the RosemaryArt 3D Textured Painting collection, natural oils and thick pigments are meticulously layered to ensure the artwork retains its glossy, rich volume for decades without losing its shape.
Which Tools Are Essential for Heavy Texture Wall Art?

While traditional brushes have their place, creating 3D textured art requires tools that can sculpt and move heavy amounts of medium. The absolute star of the texture studio is the palette knife. These flexible metal blades come in dozens of shapes and sizes, allowing artists to slap, scrape, and peak the paint.
| Tool Name | Primary Function in Textured Art | Visual Effect Created |
| Palette Knife | Sculpting, layering, and spreading thick paste | Sharp ridges, clean facets, and geometric rock/petal shapes |
| Heavy-Duty Comb | Scraping parallel lines through wet medium | Linear patterns, textile mimics, and flowing water effects |
| Coarse Bristle Brush | Stippling and lifting heavy-body paint | Grass textures, foliage, and organic, rough surfaces |
| Sculpting Spatula | Applying large volumes of modeling paste | Smooth, concrete-like minimalist backgrounds (Wabi-Sabi style) |
The Step-by-Step Creation Process
How Do Artists Prepare the Canvas for Impasto Layers?
The process of how textured paintings are made begins long before color touches the surface. Because heavy impasto layers add significant weight to the artwork, a standard flimsy canvas will warp or sag. Artists must start with a heavy-duty, tightly stretched cotton or linen canvas, often reinforced with wooden crossbars.
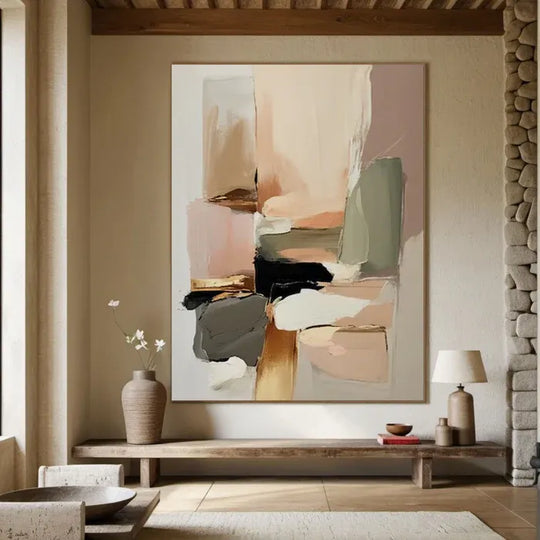
First, a primer coat of gesso is applied to seal the fabric. Once dry, the artist maps out the composition using light charcoal lines. For minimalist, rustic aesthetics—such as our popular RosemaryArt Wabi Sabi Art pieces—the background texture is laid down first using a wide spatula to create an earthy, stone-like foundation.
What is the Impasto Painting Technique and How is it Applied?
The core technique behind modern textured artwork is the impasto painting technique. The word impasto comes from the Italian word for "dough" or "mixture," which perfectly describes how the paint behaves. In this step, the artist mixes the paint with modeling gel or texture medium until it achieves a thick, butter-like consistency.
Using a palette knife, the artist scoops up a generous amount of this mixture and applies it to the canvas. Instead of smoothing it flat, the blade is lifted sharply to create peaks, or dragged sideways to leave raw, expressive ridges. According to the historical art archives at The Metropolitan Museum of Art, masters like Vincent van Gogh pioneered this technique to catch physical light and cast real shadows directly onto the canvas.
How Long Does a Heavy Texture Painting Take to Dry?
Patience is a crucial ingredient in the creation of heavy texture wall art. While the top skin of an acrylic-textured painting might dry within a few days, oil-based heavy textures dry through oxidation, which takes significantly longer.
A thick oil impasto layer can take anywhere from three months to a full year to dry completely through to the core. Moving or framing a painting too early can ruin the sculpted ridges. At the RosemaryArt gallery, we ensure every hand-painted piece undergoes a strict curing and quality-check phase so that it arrives at your doorstep perfectly set and structurally sound.
Visualizing the Craft (Studio Showcase)

Frequently Asked Questions (FAQ)
Do textured paintings collect a lot of dust, and how do you clean them?
Yes, the deep ridges of 3D textured art can catch dust over time. However, cleaning them is simple. Do not use water, liquids, or harsh cleaning chemicals. Instead, use a clean, dry, soft-bristled makeup brush or a delicate feather duster to gently sweep the dust out of the grooves once every few months.
Will the thick texture crack or peel off the canvas over time?
If made properly with professional-grade mediums, it will not crack. Cracking only occurs if an artist uses cheap fillers or applies a fast-drying layer over a slow-drying layer. High-end studios like RosemaryArt use premium, flexible acrylic polymers and aged oil binders specifically engineered to expand and contract with temperature changes without cracking.
Can I frame a heavy texture painting under glass?
It is highly recommended not to frame textured artwork behind glass. Glass compresses the physical presence of the 3D ridges and causes glare that hides the natural shadows cast by the impasto strokes. These paintings are best displayed in open "floating frames" that protect the edges while showcasing the rich texture.